
For many, working on craft projects such as oil painting, crocheting, or cross-stitching is a fun and engaging way to spend leisure time at home.
Aside from this, working on art projects can also be a therapeutic experience. Many consider this activity ideal for those who want to de-stress while honing their creativity. Thus, art enthusiasts are always on the lookout for a new craft project to work on to put their skills to the test and enjoy their free time as well.
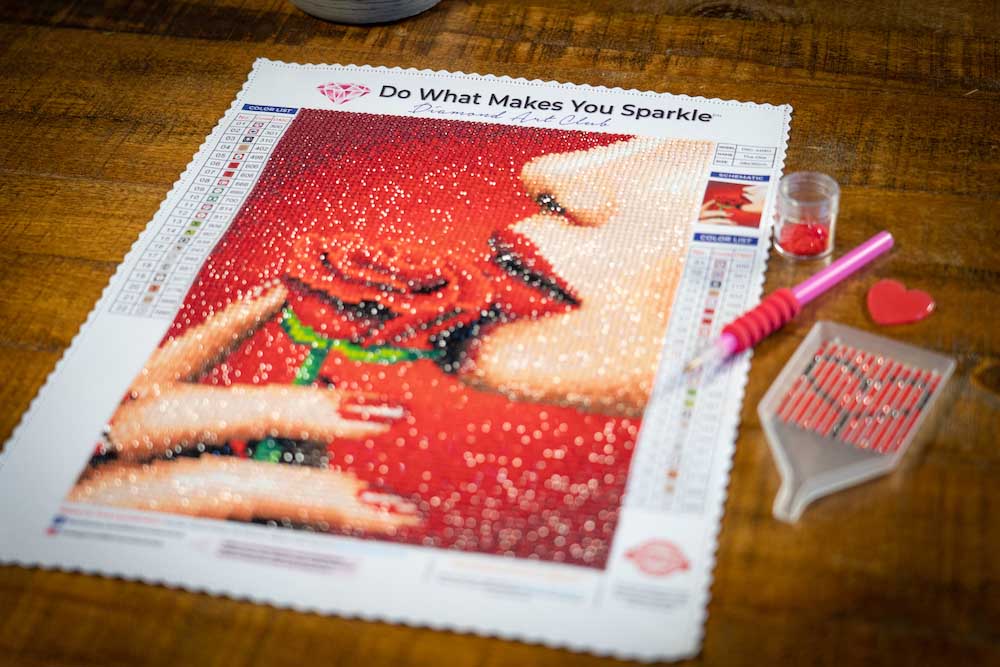
Similarly, diamond painting is a unique craft suitable for both experienced art hobbyists and beginners alike. This type of art uses colorful beads called ‘diamonds’ to create beautiful designs and images by installing them on a patterned canvas using an applicator pen and adhesive agents.
Furthermore, there are lots of designs to choose from that will allow you to create a colorful, bedazzled image that will liven up a plain wall or brighten up a room. If you’d like to give it a try, here’s an easy-breezy guide to diamond painting for beginners:
Components Of A Diamond Painting Kit
source: filmdaily.co
Commonly, each diamond painting kit contains the following items:
Canvas Printed With Design
Each canvas includes a drill application guide, which the user will follow based on the colors of each diamond. The canvas also has an adhesive agent pre-applied to its surface to make diamond application easier for the user.
Diamonds
The kit also includes all the diamond colors you’ll need to complete the project. Each color is delivered in a separate bag to help you organize and identify them more quickly as you start working on your craft kit.
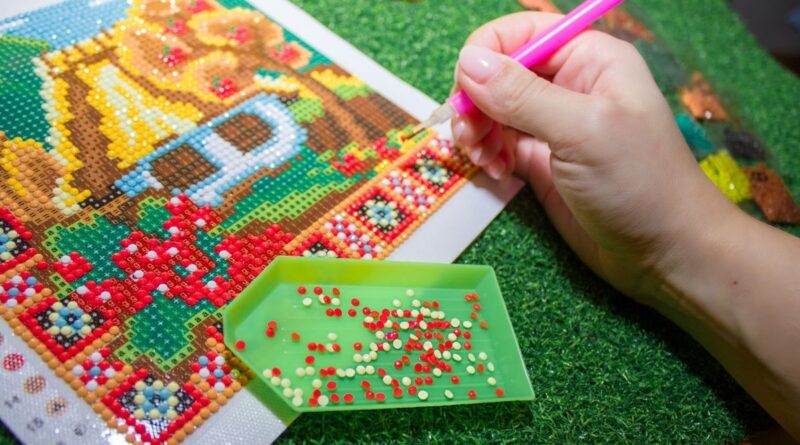
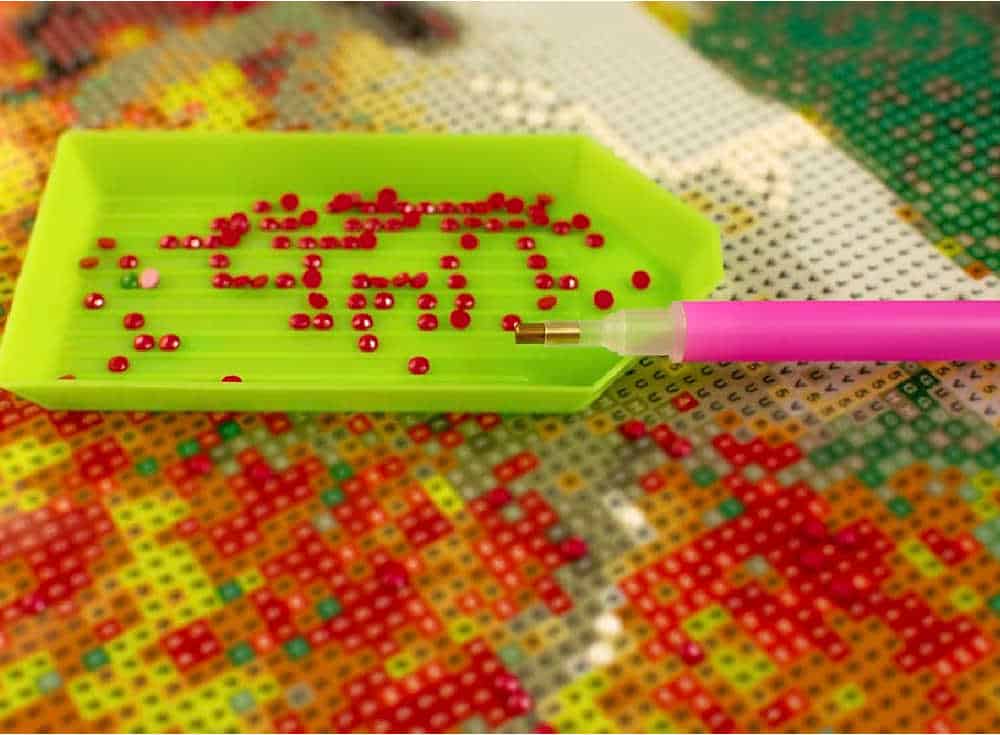
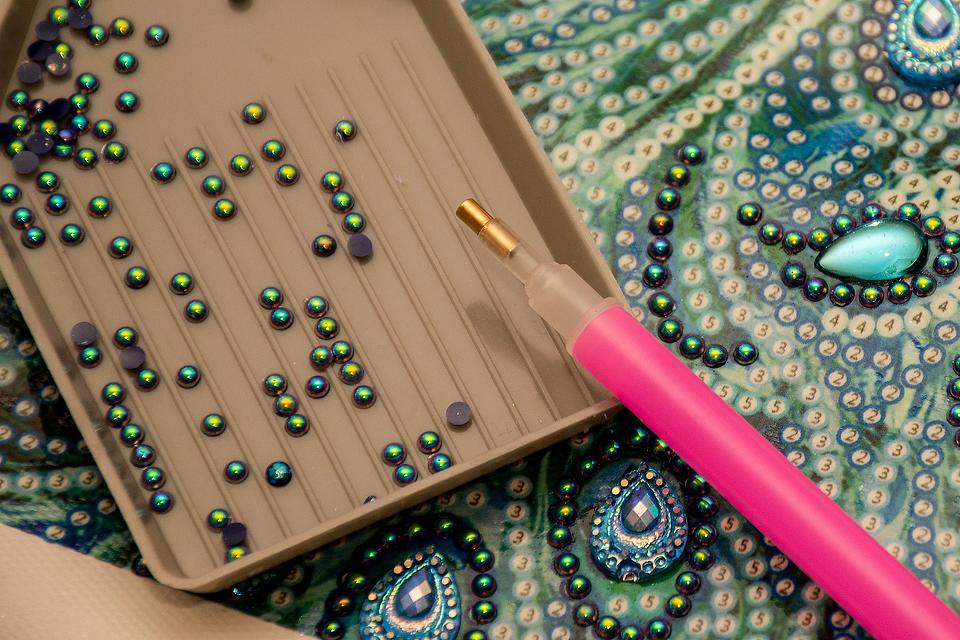
Small Tray
source: trembelingart.com
You can pour each bag one at a time onto a small tray provided in the kit before starting your diamond application. Pouring the diamonds on the tray will make it easier to pick them up one by one using a stylus.
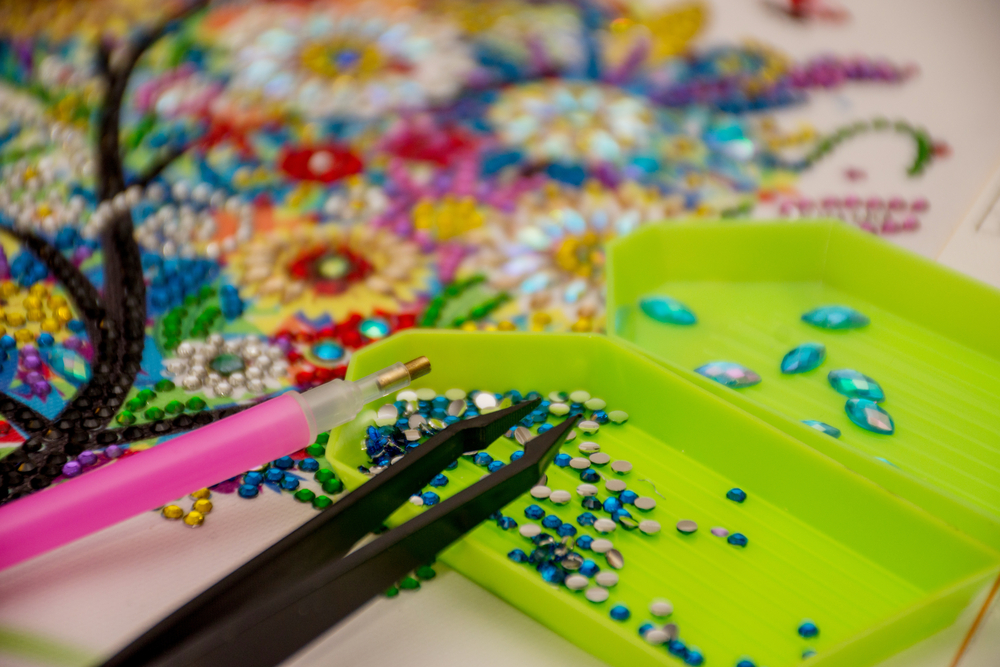
Application Tools
There are also several application tools that you can use that are included in each kit. Usually, kits contain a diamond pen tool, used with a wax pad to pick up each diamond before applying them to the canvas. You’ll also receive tweezers to help you pick up or adjust diamonds more conveniently.
How To Get Started
Prepare Your Diamond Painting Kit
Unpack your diamond painting kit and ensure that all the items you’ll need are on your table or working desk.
Lay Out The Canvas
Ensure that your work surface is clean before rolling out your canvas. Smoothen out its edges and lay it flat against the table or desk. If needed, you can put paperweights or other heavy objects under the canvas to hold it in place.
Study The Color Legend And Design Pattern On The Canvas
source: shopify.com
If you’re going to work on a diamond painting for beginners as your first project, it’s helpful to familiarize yourself with the legend found on the kit or the side of the canvas before getting started. You can strategize how you’ll apply the diamonds and pick an area where you’ll be comfortable starting.
In addition, you’ll also need to know which colors are represented in the legends to ensure that you apply the diamonds accordingly. Many diamond painting enthusiasts find it best to start at the bottom of the canvas for better convenience and work efficiency.
Prepare The Diamonds
Once you’ve determined the section you want to work on, pick the diamond color required and pour a sufficient amount on the small tray. You can shake the tray gently to adjust the diamonds in an upright position to make it easier for you to pick them up later. You can also manually adjust each piece with a tweezer as needed.
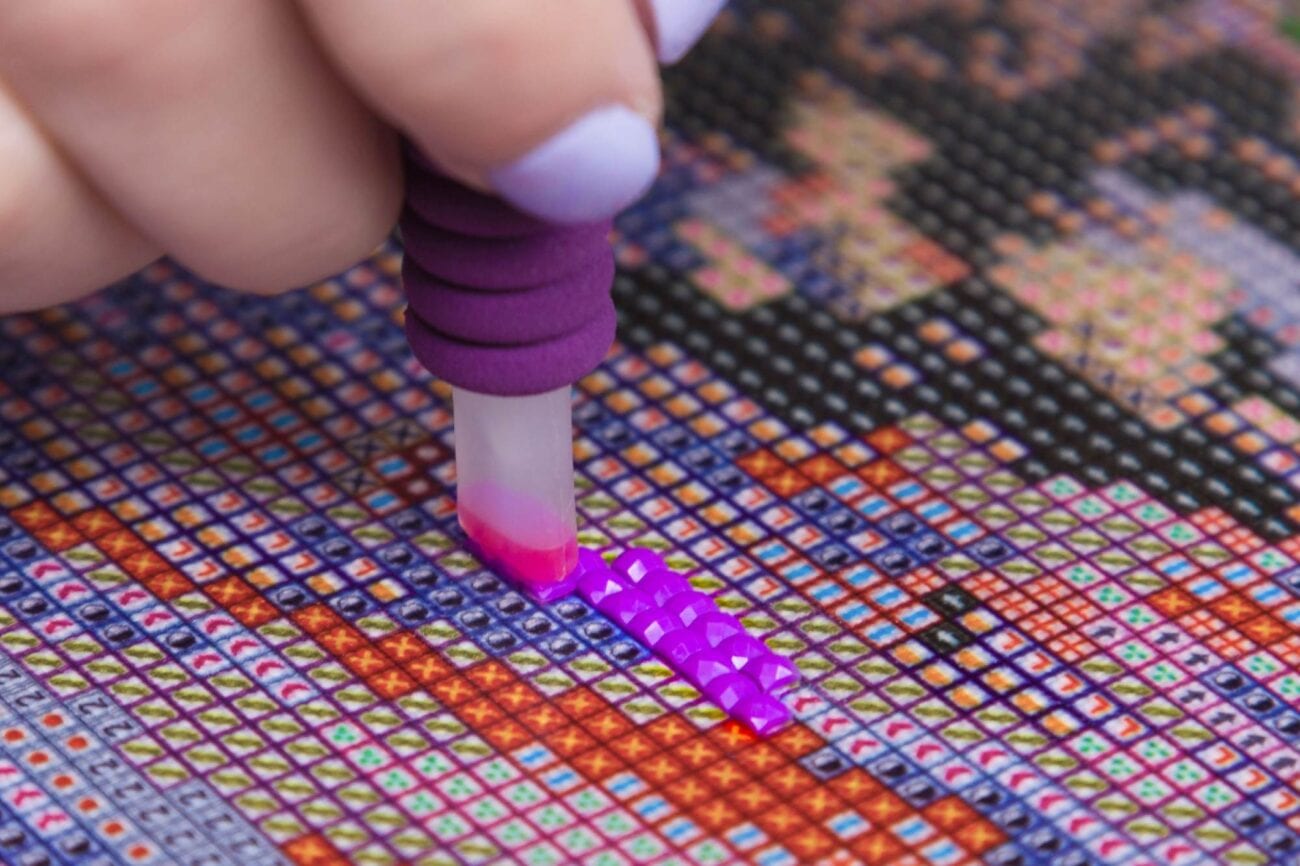
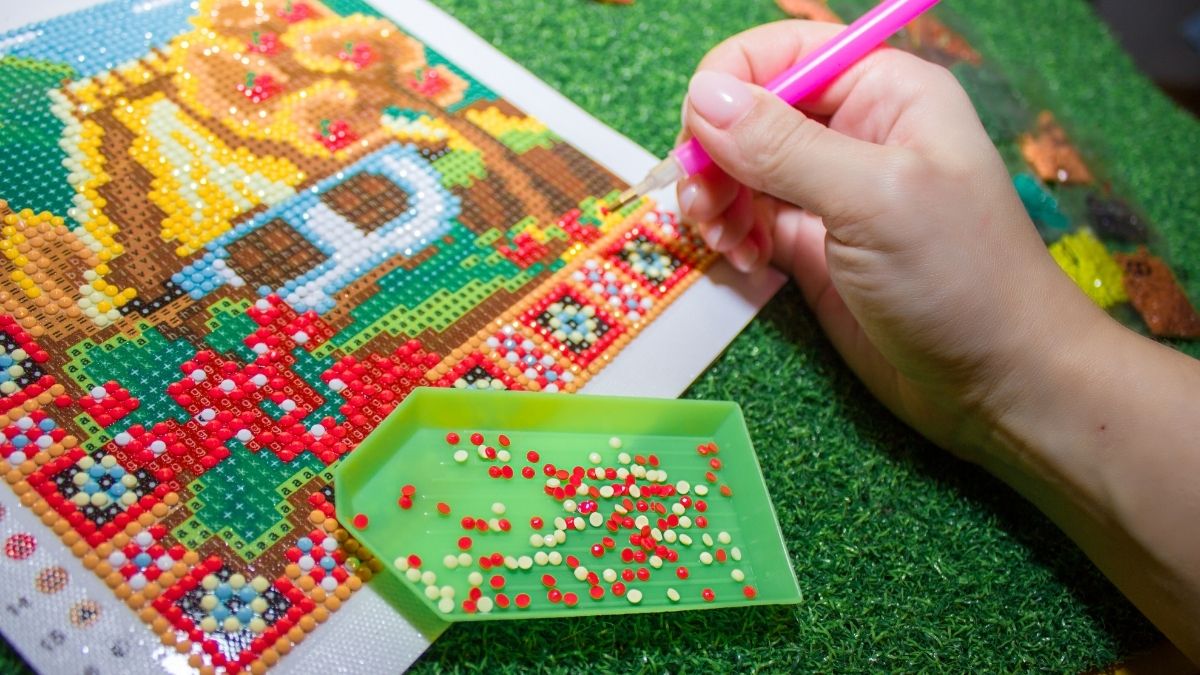
Apply Diamonds To the Canvas
source: shopify.com
Refer to the legend on the side of the canvas to determine the color of diamonds you need for each area. Then, gently peel off the protective plastic layer to reveal a small portion of the canvas.
While doing so, you’ll need to ensure that the rest of the plastic layer is covering the other parts of the canvas to prevent the adhesive from drying out. Before proceeding with the application, you can put a heavy book on top of the areas you’re not working on to ensure that the plastic cover stays in place.
Next, take out your applicator pen and wax caddy, then apply a small amount of wax to the tip of the stylus. Pick up each diamond using the tip of the pen and apply the diamond gently to the canvas. You can reapply wax to the tip as required.
Secure The Diamonds In Place
After each diamond painting session, return the plastic film to its place, ensuring that the whole surface is covered for protection. Then, place a flat, heavy object such as a book on top of the completed area to ensure that the diamonds will be securely attached to the canvas as the adhesive dries.
Put Your Diamond Painting On Display
You can mount your completed diamond painting and put it on display as wall art. You can do this by using stretcher bars, poster boards, magnetic hanger bars, or mounting the canvas to a foam board.
On the other hand, if you have a large painting, you can also consider having it professionally mounted using a wooden frame with a glass panel.
Tips And Tricks
Keep Your Canvas Straight And Smooth
source: theholymess.com
It can be challenging to work on a crumpled or creased canvas, and it can also impact the visual appeal of your project. To keep your canvas crease-free, you can apply weight on top of it for several hours or overnight. You can do this by holding it under a mattress or by putting it under heavy objects such as books.
If there’s air trapped between the plastic covering and the canvas, don’t remove the protective layer as it can compromise the whole surface. Instead, you can carefully release the air by cutting the plastic material over the area.
Organize Your Painting Kit
It’s crucial to stay organized when working on a diamond painting project. Staying organized helps you secure all the diamonds and prevent losing or damaging your art tools and supplies.
While each diamond color is packaged separately, it may be easier to access them later on when they’re secured in a transparent, sealed container such as jars or tubs. This way, you can identify which one you’ll need more quickly and avoid spillage.
Protect The Wax From Drying Out
Your diamond painting kit will include a wax caddy and a stylus pen, which you’ll need to pick up diamonds one by one for application. When exposed to air, the wax can dry out, hence affecting its usefulness. To prevent your wax from drying out, you’ll need to ensure that its container is tightly closed.
Additionally, you can also wrap the stylus pen with wax in a plastic bag to use it next time without problems.
Prepare Solutions For Common Issues
One of the most common issues in diamond painting is having a soiled canvas. At times, paper, fur, and dust can stick to the canvas, which can be unsightly and can get in the way of your work. You can use a wet wipe to remove impurities and gently rub the area until the debris is cleared. Then, wait for the area to dry completely before applying diamonds.
If the diamonds are accidentally scattered on the floor, you can use your vacuum cleaner and put an old pantyhose over the nozzle to collect the pieces. Then, you can sort the diamonds accordingly.
In cases where this isn’t possible, or much of the kit was lost or damaged, you can consider filing an insurance claim for the product you’ve purchased.
File An Insurance Claim
source: pinterest.com
Many major diamond painting companies offer customers insurance coverage if the kit is rendered unusable. For instance, your canvas may have been damaged, or the majority of the diamonds may have been lost.
In these cases, you can take a picture of the damaged kit and send it to the company’s email address along with the following information:
- Your name
- Order number
- Brief description of how the kit was damaged
- Your request
Depending on where you purchased your diamond painting kit, you might be required to send other details or documents relevant to your purchase. So, it’s best to have everything prepared if you need to file an insurance claim. After filing a claim, some companies offer customers a replacement of the missing parts or the complete kit, whichever is required.
Conclusion
Creating a diamond painting for beginners can be a unique, fun, and rewarding experience. Many users find the placement of each piece satisfying and relaxing.
And those who are fond of art projects will appreciate the beautiful crafts built once a project is completed. It’s also a great way to practice your organizational skills while putting your creativity and imagination to work.
As with any other art project, preparing an organizational system is always wise to help you stay on track. This way, you can use your time, effort, and resources wisely while getting the desired results.
Moreover, many diamond painting enthusiasts find gratification in organizing their beads and other parts of the painting kit. Thus, if you love the process of keeping your work items organized, then you’re sure to find enjoyment with a diamond painting kit.